























Vacuum Oven Won't Hold Vacuum? Door Gaskets, Valves and Leak Checks
A vacuum oven that will not hold vacuum, or takes far longer than it used to, is one of the most common service calls we get. The good news is that the cause is almost always simple: a tired door gasket, a valve left cracked open, a loose hose barb, or a pump that has lost performance. This guide walks through a logical order for vacuum oven troubleshooting so you find the real problem instead of replacing parts at random.
How a vacuum oven holds vacuum
A vacuum oven is a sealed, heated chamber. The pump removes air and vapour, and atmospheric pressure, about 1013 mbar at sea level, pushes the door against its gasket. The lower the chamber pressure, the harder the door is pressed shut. That is why most oven doors need a firm push for the first few seconds of pump-down, then lock themselves in place.
Every joint between the chamber and the atmosphere is a possible leak path: the door gasket, the window seal, the vacuum valve, the vent (release) valve, the inert gas port, the gauge fitting, and every hose and barb between the oven and the pump. The chamber pressure you actually reach is a balance between what the pump removes and what leaks or evaporates back in.
Read the vacuum gauge correctly first
Before chasing a leak, make sure there is one. Most oven gauges are mechanical dial gauges that read relative to atmosphere, usually in inches of mercury (0 to -30 inHg) or MPa (0 to -0.1 MPa). A few points matter:
- Full scale is not reachable. A perfect vacuum at sea level would read about -29.9 inHg. A pump that reaches 8 mbar absolute would show roughly -29.6 to -29.7 inHg, which is hard to tell apart from a perfect reading on a dial.
- Altitude lowers the maximum reading. At around 1000 m elevation, atmospheric pressure is roughly 900 mbar, so even a perfect vacuum would only show about -26.6 inHg. An oven that read lower after a move inland may be working perfectly.
- Dial gauges cannot resolve low pressures. Below a few tens of mbar, a mechanical gauge is coarse. If your process depends on low absolute pressure, an absolute gauge or digital vacuum gauge gives a truer picture.
- Gauges fail too. A bent needle or solvent-damaged gauge can show a leak that is not there. If in doubt, compare against a second gauge.
Step 1: Isolate the pump from the chamber
The first job in any vacuum oven leak check is to find out which side of the system is at fault.
- Disconnect the hose from the oven and connect a gauge directly to the pump inlet (or cap the hose end and put the gauge on it).
- Run the pump for a few minutes and note the lowest reading.
- Compare with the pump's rated ultimate vacuum.
If the pump alone cannot reach its rating, the problem is the pump or hose. On oil pumps, look at oil colour and level; solvent-contaminated oil is a frequent cause of poor vacuum. On diaphragm pumps, worn diaphragms or valves are typical wear items. If the pump reaches its rating on its own, move on to the oven.
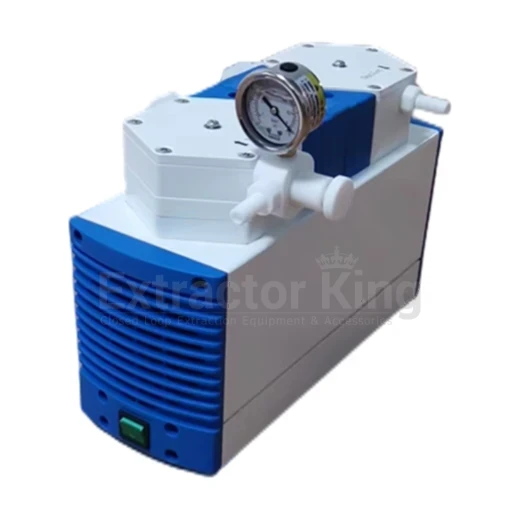
For solvent-laden drying, a dry pump with a chemically resistant gas path avoids the oil-contamination problem entirely. Our Science King B-Series PTFE diaphragm vacuum pumps are oil-free and water-free, with every gas-contact part made of PTFE. The B20 and B40 reach 8–10 mbar and include a vacuum gauge, which is handy for exactly this kind of isolation test. Note they run on 220 V, 60 Hz, not a standard 120 V outlet, and they are not suitable where explosion-proof equipment is required.
Step 2: Do a rate-of-rise test on the oven
With the pump connected, pump the empty, clean, cool oven down as far as it will go. Close the oven's vacuum valve, then switch off the pump and watch the gauge over 10 to 30 minutes.
- Pressure rises steadily in a straight line: a real leak. Air keeps coming in at a constant rate.
- Pressure rises quickly, then levels off: outgassing. Moisture or solvent left on shelves, in the gasket or in the insulation is evaporating. Bake out the empty oven under vacuum and test again.
- Pressure barely moves: the chamber is tight. Slow pump-down during real runs is then caused by your load releasing vapour, which is normal, or by an undersized pump.
Always test empty. A warm load releasing solvent will look exactly like a leak on the gauge.
Step 3: Check valves, ports and fittings
Valves are the second most common leak point after the gasket. Work through each one:
- Vent valve: confirm it is fully closed. Needle-style valves can be overtightened, which damages the seat and causes a leak that gets worse over time.
- Inert gas port: ovens with an inert gas port and valve have one more joint to check. Make sure the valve is closed and any line attached to it is not open to air.
- Threaded fittings: check that thread sealant is intact and fittings are snug. Wiggle each fitting gently while watching the gauge; a jump in the needle points to the culprit.
- Hoses and barbs: use thick-walled, vacuum-rated hose. Thin hose can collapse under vacuum, and hose ends crack and split at the barb over time. Trim cracked ends and re-clamp.
- Multi-oven manifolds: if one pump serves several ovens, a single open door or valve on any oven will spoil vacuum on all of them. Isolate each oven with its own valve and test one at a time.
Listening helps. With the pump running and the room quiet, a significant leak often hisses. You can also temporarily dab a little vacuum grease on a suspect joint; if the gauge improves, you have found the leak.
Step 4: Inspect the door gasket
With the oven off and cool, look closely at the full length of the gasket:
- Compression set: a flattened, hard gasket that no longer springs back.
- Cracks, cuts or nicks, often at corners or near the latch.
- Swelling, softness or stickiness: a sign of chemical attack from the vapours you are drying.
- Debris: powder, sample residue or a hair across the sealing face is enough to leak.
- Seating: the gasket should sit evenly in its groove with no twists or lifted sections.
Clean the gasket and the mating surface on the chamber with a lint-free cloth and mild detergent and water, then dry. A paper-strip test checks compression: close the door on a strip of paper at several points around the frame and pull. You should feel similar drag everywhere. Spots where the paper slides out easily may mean the gasket or the door latch and hinge need attention.
Vacuum oven door gasket replacement
If the gasket is damaged or chemically attacked, replace it rather than trying to coax more life from it.
- Switch off, unplug and let the oven cool fully.
- Pull the old gasket out of the groove and note how it was fitted, including where the ends meet.
- Clean the groove thoroughly; old residue will hold the new gasket off its seat.
- Press the new gasket in, starting at the top centre and working around evenly. Do not stretch it, or it will shrink back and leave a gap.
- Close the door and leave it closed for a while so the gasket settles, then run a rate-of-rise test.
Confirm the gasket profile and size for your oven model before ordering. A gasket of the right material but the wrong cross-section will not seal.
Viton vs silicone gasket: which suits your work?
The gasket material should match what you are drying. Silicone and Viton (a fluoroelastomer, often called FKM) behave very differently around solvents.
| Property | Silicone | Viton (FKM) |
|---|---|---|
| Heat resistance | Good | Good |
| Flexibility and resilience | Very soft, seals easily | Firmer |
| Hydrocarbons, aromatics, oils | Poor; tends to swell | Good |
| Many chlorinated solvents | Poor | Generally good |
| Ketones (e.g. acetone) and esters | Fair to poor | Poor; can swell badly |
| Gas permeability | Relatively high | Lower |
In practice, silicone is a sound general-purpose choice for drying water, alcohol-wet or lightly solvent-laden samples, and it seals well with low door force. If your loads release hydrocarbons, aromatic solvents or oils, and the silicone gasket keeps swelling or going sticky, Viton is usually the better match. If you work mainly with acetone or ester solvents, Viton is not an automatic upgrade, so check a chemical compatibility chart for your specific solvents first.
Matching the oven and pump to the job
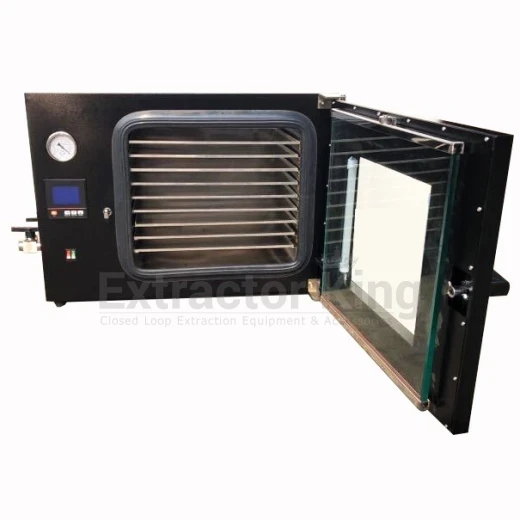
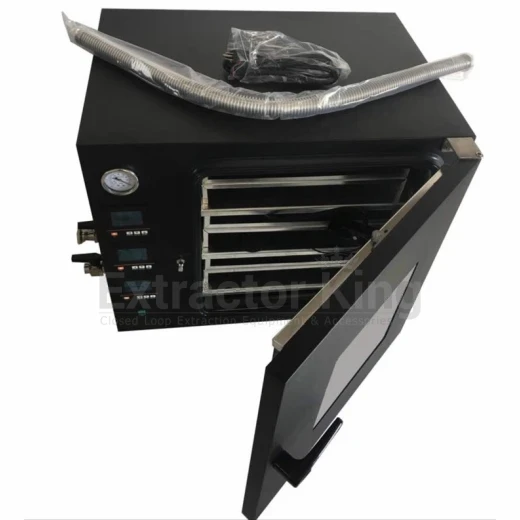
Our Science King vacuum ovens all use a silicone rubber door seal, stainless steel chambers, a double glass window and an extra port and valve for inert gas. The 1.9 Cubic Foot Vacuum Oven has 9 aluminum alloy shelves and runs on 110 V. The 3.4 Cubic Foot Vacuum Oven has 6 independently heated shelves on 3 digital controllers, and the 7.8 Cubic Foot Vacuum Oven has 19 shelves, a Fuji digital controller and wheels; both larger models run on 220 V. Each comes with fittings and a tube for joining ovens, so one pump can serve several units. If you link ovens, remember the manifold advice above.
Whatever equipment you run, keep the area well ventilated when drying flammable solvents, protect the pump from liquid carry-over, inspect glass and gaskets regularly, and follow the manufacturer's manual for your model.
Still chasing a leak, or planning a new drying setup? Request a quote and tell us what you are drying and which solvents are involved. We will help match the oven, pump and gasket material to your process.